

Here at American Art Decor we love the look of galvanized metal decor. It has a certain texture and shine that you just can't get with any other material. Plus it goes with practically everything! The textured silver of galvanized metal looks great on its own, but customizing your home decor really showcases your unique personality. Keep reading for our tips for a quick and easy DIY project, using a stencil to personalize galvanized metal decor.

Find your decor
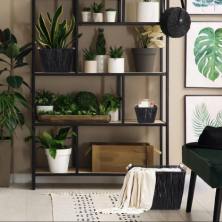
Galvanized metal is a farmhouse staple, so you shouldn't have to look too far to find a piece you love.
In addition to wall decor, furniture, storage, and architectural uses, you can find all manner of home accessories that make use of galvanized metal. Containers are a frequent favorite, including buckets, pitchers, flower pots, baskets, canisters, trays and more. Find a new piece that speaks to you, or revamp an older item. Decide where you'd like to eventually place it, and then we're ready to think about stenciling!

Pick your text or design
There are endless uses for stencils, ranging from the practical to the purely pretty. We'll describe a few examples, but don't be afraid to use your imagination! Use stencils to adorn your entryway with a piece featuring your family's name, house number, or address to welcome visitors. Maybe you have a charming nickname for your home; just imagine a heartwarming planter on your front stoop that says "Our Little Nest".
Stenciling a label or name onto containers made from this gorgeous material can also help keep things organized in your kitchen, living room, bedroom, or bathroom. Try out his and hers toiletry baskets, or charming labeled storage for your craft supplies. A simple design can also be really fun. Hearts, arrows, stars, and bands of color are a great starting point. Stenciling an image can sometimes be a little bit trickier than using printed text, but remember, you can always test on some scrap materials until you feel confident in your skills.

Choose a paint color
Black is simple, easy to read, goes with everything, and stands out nicely against silver. But don't feel limited to that one classic option. Perhaps you want to match your flower pot to your window shutters with a green accent, or use the yellow shade of your kettle to label your tea tin. If you're feeling extra ambitious, you can use multiple colors too. Just be sure to leave drying time between colors if you don't want them to blend together.
For the project pictured here, we used a can of black spray paint. We love how quick and easy spray paint is once you get the hang of it. You can find a couple of tips on using spray paint specifically further down in this post!
Chalk paint is another great paint option that we mentioned back in our 5 Quick Ways to Transition to Farmhouse Decor blog post. You could even go with a thin layer of standard acrylic paint if that's what you have laying around! Just stay away from water-soluble paints like tempera or watercolors, especially if your stenciled decor will be outside, near a sink, or need to be periodically washed.

Cut out the stencil
Using a craft knife or x-acto blade, cut out all of the printed image. (Depending on your design, you might be able to use scissors for some of this as well.) Make sure to do this on a cutting mat, scrap cardboard, or other surface to prevent cutting through the paper into your table!
As you trace the lines, be mindful of any small details like the thin lines in the E pictured above. It's easy to accidentally snip a very small piece like that off! But no fear: it's often an easy fix with a strategically placed piece of tape.
If the whole sheet of paper is a little unwieldy for your object, you can trim the edges down a bit. Leave some blank area around your stencil, however, so you don't end up with a painted box outline of your paper's edges. (Unless that's an intentional part of the look, in which case go wild!)

Painting prep
Before you start stenciling, you want to make sure your surface is clean. Dirt, grease, or grime can interfere with your paint. Wipe down the area you'd like to stencil ahead of time so it can thoroughly dry before you start painting.
Find a well-ventilated spot to paint in, and protect any surfaces you don't want painted with a cloth or plastic sheet.
Take your cutout stencil and affix it to the bucket, pitcher, or other item with masking tape and/or a glue stick. You can also use masking tape or painter's tape to create lines or cover over areas that you want to paint with a different color.
A key thing here is making sure the stencil is laying as flat as possible on the surface of your decor item. If you have lots of small edges in your paper, we recommend using an easily removed glue to secure them while you paint.

Paint!
Holding the spray can a few inches away, spray over the stencil in an even back and forth motion until you've covered all the cutout area. If you're having trouble with a consistent spray, maneuver so you can hold the spray can upright while it directly faces the stencil. If you're using paint and a brush, use a thin layer of paint in even strokes. Take care not to let the bristles of the brush get under any of the stencil edges.
As we mentioned above, make sure your stencil is right against the surface you're painting on. Gaps between the surface and the stencil can let paint get under the stencil, smudging your lines. Use tape, or even a glue stick, to make sure the stencil is securely placed before you start. Wear rubber gloves to avoid getting paint on your hands, and again--stay in a well-ventilated area. (Safety first!) If you're spray painting outside, avoiding doing so on a windy day, when a strong gust might redirect your spray.
Don't remove your stencil while the paint is still wet and drippy, as you can smudge your fresh paint job. For extra durability, once it's dry you can go over it with a quick coat of clear spray sealant.

Enjoy your handiwork
Once your newly stenciled decor is completely dry, you can have fun styling it into your home. Add some fresh or dried flowers, use it for storage, or simply let the piece stand on its own!