Have you ever noticed just how expensive pre-made fall decor can be?
Think about it – one full, well-built wreath usually costs at least over $100, if not more. And what about those centerpieces? Even at bargain stores, you’ll find them running somewhere between $35 to $75. You can’t customize them and you certainly can’t take them apart to re-use for other occasions later. You pretty much get what the store has, and that’s it. If you’re wondering if there’s a more practical way, there is.
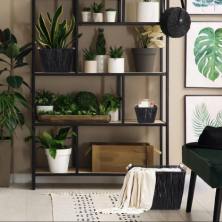
This season, rustic farmhouse crates are continuing to enjoy popularity in interior design. They come in a variety of sizes, shapes, and styles, so you’re sure to find something you love. Plus, they’re not only practical, they’re also the perfect base for a beautiful centerpiece!
Why You Should Create Your Own Fall Centerpieces
There are a few reasons we think it’s better to just create your own centerpieces.
- It’ll save you money in the long run.
- You can customize them to your own tastes.
- Store-bought pieces are often shoddily-made.
- You can reuse the individual elements of the centerpiece for other purposes and occasions.
Plus, creating your own fall centerpiece using a crate is not nearly as difficult as you think. Don’t believe us? Here are five easy steps.
Supplies You’ll Need
Here’s what you’ll need to make your own centerpiece:
- A crate
- A few main focal items, like pumpkins, lanterns, or candles of varying sizes
- Floral styrofoam (enough to fill the base of the crate)
- Floral fillers, picks
- Floral wire (just in case you need help securing anything)
- Wire cutters
- Hot glue (note: we don’t recommend hot gluing anything directly to the crate if you’d like to reuse it for something else later)
1. Choose the crate

Well, obviously, you’ll need a crate. As we mentioned before, crates come in a vast array of styles, materials, colors, shapes, and sizes. Of course, if you want a more understated centerpiece, you may want to opt for a smaller or shorter crate, like this unique vintage wood and metal tabletop crate. More dramatic pieces will call for something taller, like this.
At the end of the day, it’s really up to you. Do your best to envision the finished product, taking into account where it’ll be placed.
You can find all kinds of crate inspiration by checking out our collection here.
2. Choose a theme

The next step for creating a fabulous fall centerpiece is deciding on a more specific theme than just “fall.” Some things to take into consideration:
- Do you want a more refined look or a more rustic appearance?
- Do you want to focus on florals? Foliage? Fruit? Something else?
- What other elements do you want to include? Lanterns? Candles?
- Is there a particular color scheme you’d like to stick to?
The easiest way to select a theme and stick to it is by writing down a list of your must-haves. As you’re out shopping for the centerpiece materials, periodically check your list to make sure you’re sticking to the plan. Otherwise, you’ll be in danger of ending up with a ton of fall-themed items that really don’t work well together in the end.
3. Start with the styrofoam as the base

Whether you’ve got a larger crate or smaller crate to work with, putting floral styrofoam at the base of your centerpiece will achieve two things. First, it helps to preliminarily fill up the space so that you’ll require fewer decorative elements, which helps save money.
Second, the styrofoam will serve as an anchoring element for any florals, foliage, or other fillers. In other words, you can literally stick the base of a stem into the styrofoam to secure it. This also makes it easy for you to place the fillers in such a way that they stay where you intend them to. But don’t add any fillers just yet.
4. Add the main components

Once you have the floral styrofoam situated at the base of the crate, now is the time to add any main components to the centerpiece. For example, if you’ve decided to use a large lantern as the focal point of the centerpiece, now is the time to place it right where you want it to be. You may need to rearrange and adjust the styrofoam around the lantern if needed.
Any other decorative elements (like small pumpkins or glass votives, for example) that aren’t fillers should be placed next. Remember – interest is created when you vary size and shape. If you decide to use three lanterns in your centerpiece, it’s best to have them be three different sizes or heights. If one medium pumpkin is the center focal point of the piece, other decorative elements around it (even if they’re other pumpkins) should be a little smaller.
5. Finish with fillers

Now that you have the main components of the centerpiece in place, now is the time to add the fillers. Whether they’re leaves, faux stems of baby’s breath or cotton, or decorative floral picks, place them one by one in strategic spots around the focal points. The goal is to make the centerpiece appear full and to ensure the styrofoam base is concealed without covering up the main elements. Larger fillers should be placed first, with the smallest fillers placed last. Decorative picks are the very last additions.
You’ll likely have to arrange and then re-arrange the elements of the centerpiece at least a few times in order to get it how you want it. One thing you definitely don’t want to forget is to take a 360-degree assessment of your work – make sure the whole piece is well-balanced and that you haven’t missed any gaps.
Need some crates to create your own fall centerpieces?
At American Art Decor, we design, manufacture, and retail all our own products, offering an eclectic range of modern farmhouse-inspired decor, a vast array of rustic farmhouse crates!
From antique-inspired vintage cabinets to rustic chic baskets and hanging wall mirrors, we cut out the middleman to bring a carefully curated selection of high-quality home décor directly to you, the consumer. And thanks to our user-friendly online store, shopping for our products is as simple as clicking a button.

